Anchor bolts, also known as embedded bolts or foundation bolts, are high-strength fasteners used in concrete foundations to connect steel columns, equipment bases, mechanical supports, etc. The correct installation method directly determines the stability, safety, and lifespan of the equipment.
This guide provides a comprehensive overview of anchor bolt installation from multiple perspectives—including installation methods, construction procedures, key precautions, and inspection standards—to help engineers, purchasers, and construction teams quickly understand and effectively implement the process.

When installing foundation anchor bolts, ensure that they are accurately placed in their intended location to avoid subsequent secondary adjustments. These types of problems usually stem from minor deviations in location during installation, leading to significant discrepancies in the pouring process, which in turn triggers unnecessary rework and wasted costs. Next, we’ll take a closer look at how anchor bolts are used and connected in housing installations.
Installation Types
Generally, the connection methods of anchor bolt threads can be divided into the following three categories:
Permanent fastening, the bolts in this type of connection are very solid and do not easily detach, e.g. by riveting or electro-welding. At the foundation anchor bolt threads, a screw cap is usually electro-welded to ensure the permanence of the connection.
Pluggable fastening, this type of connection allows parts to be disassembled and reassembled at a later stage, but may cause some damage to the fastener. While foundation anchor bolts themselves do not utilize this type of drive, certain fasteners, such as pins, do utilize this type of method.
Inserted fastening, this method is particularly suitable for occasions requiring frequent disassembly and assembly, for example, anchor bolts are usually installed with this method of screwing, to facilitate the later maintenance and disassembly work.
Installation Methods for Different Devices
Anchor bolt installation methods typically include pre-embedding and secondary grouting embedding with pre-drilled holes. Both methods can achieve a firm bond between the anchor bolt and the concrete.
For large mechanical equipment such as towers, tall containers, and spherical tanks that experience significant vibration, the method of directly embedding anchor bolts is often used for construction.
When directly embedding foundation bolts, ensure that the centerline of the anchor bolt is at least 100mm from the edge of the foundation. If the dimensions do not meet the standard, the installers should make adjustments according to relevant regulations to enhance the stability of the foundation.
For stationary equipment such as horizontal vessels, heat exchangers, and small vertical vessels, as well as machines and pumps with minimal vibration, the method of inserting anchor bolts into pre-drilled holes and then grouting them for fixation can be used. This method is easy to adjust, facilitates precise positioning of anchor bolts, and eliminates the need for positioning templates.
When installing machinery in a villa’s basement or on a cement wooden floor, hooks are needed to connect the anchor bolts to the building’s reinforcing steel. If the machinery and equipment do not have building-grade steel, garden steel can be used; simply thread it through the hook to complete the connection.
Construction Process (Embedded Type)
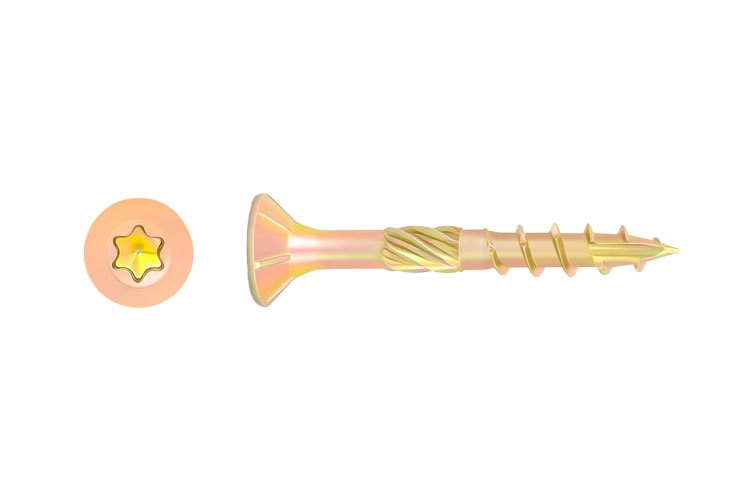
First, before installation, carefully inspect the anchor bolts (J-type, L-type, U-type, claw-type, 9-type, plate type, single-ended and double-ended anchor bolts) to ensure they are intact and that their surfaces are thoroughly cleaned of dirt and oil. Apply grease to the external threads to make it easier to install the nut. Simultaneously, carefully check the fit between the anchor bolts and nuts to ensure a tight seal.


Process flow: foundation reinforcement binding → bolt positioning → formwork erection → concrete pouring → vibration compaction.


Step1: Tool Preparation
Laser level/total station, torque wrench, electric drill, impact drill (for rear installation), spirit level, steel ruler, tape measure, template positioning frame (wooden/steel plate).
Step2: Foundation Layout and Positioning
Using a theodolite or laser level to project lines, the center point of the positioning bolts should be aligned with the elevation; the deviation should generally be ≤ 2 mm.
Step3: Create Positioning Template
Templates are typically made of steel plates or wooden boards with holes punched in for positioning. Hole diameter > bolt diameter 2–4 mm, keep the template absolutely horizontal, and weld it to the reinforcing steel to prevent displacement during pouring.
Step4: Mounting Fixing
The bolts are passed through the holes in the template and secured with double nuts. They are then welded to the foundation reinforcement. The bolt verticality is checked again (≤1/1000).
Step5: Concrete Pouring
Pour the concrete in layers, avoid the vibrator colliding with the bolts, keep the formwork from shifting, and prevent grout from sticking to the threads (it is recommended to use protective sleeves).
Step6: Acceptance
Check the exposed length of the center position deviation, perpendicularity, and thread integrity.

Reserved Hole Secondary Grouting Method
Process flow: Foundation pouring → Cleaning of reserved holes → Bolt installation → Equipment positioning → Non-shrink concrete grouting.
Technical requirements:
- The reserved hole size is ≥100mm×100mm, and the distance between the bolt and the hole wall is ≥20mm.
- Fill the gap between the equipment base and foundation.
- After curing, reassemble the equipment and tighten the nuts.
- Grouting material flowability ≥ 340mm, 28-day compressive strength ≥ 60MPa.
Case Study: During the installation of a chemical reactor, the use of C60 high-strength grouting material reduced the vibration level of the equipment by 60%.
Anchor Plate Installation Method
Process flow: Foundation pre-embedded anchor plate → Bolt welding → Non-destructive testing → Corrosion protection treatment.
Technical requirements:
- The anchor plate weld quality meets the requirements of JB/T 4730.2 Class II, with 100% ultrasonic testing coverage.
- Suitable for large-diameter bolts (M48 and above) and applications requiring tensile forces ≥1000kN. Example: The Hong Kong-Zhuhai-Macau Bridge immersed tunnel uses anchor plate-type U-bolts, with a single bolt bearing capacity of 1500kN.
Anchor Bolt Installation: FAQ
❓ 1. What to do if anchor bolts are misaligned?
✔ Use enlarged base plate holes.
✔ Use post-installed chemical anchors for repair.
✔ Reinforce with secondary grouting.
❓2. Are the anchor bolts too short?
✔ Use connecting sleeves to extend or redo post-anchoring
❓3. The threads were covered by cement?
✔ Use a sleeve for protection; threads can be repaired with a tap.
❓4. Are the bolts loose while the equipment is running?
✔ Double nut locking, spring washer, replaced with high-strength chemical anchors.
Need Custom Anchor Bolts?
We support non-standard designs and designs based on provided drawings or samples! We can produce:
- J-type, L-type, U-type, anchor plate type, pawl type, double-ended anchor bolts.
- M12–M100 can be customized.
- Carbon steel, stainless steel, alloy steel, high-strength steel.
- Zinc-plated, hot-dip galvanized, Dacromet, Teflon coated.
👉 Add to Inquiry
Construction Quality Control
- Material Inspection: A material certificate must be provided for each batch of steel, and spectral analysis must show an impurity content ≤0.025%.
- Installation Accuracy: Bolt verticality error ≤0.5mm/m, horizontality deviation ≤2mm.
- Grouting Compaction: Ultrasonic testing is used, with an abnormal sound velocity zone proportion ≤5%.
Common Failure Modes and Countermeasures
- Bolt loosening: The main causes are insufficient torque or concrete shrinkage. The solution is to use a hydraulic torque wrench for calibration, with a preload error of ≤±3%.
- Corrosion damage: In coastal areas, the annual corrosion rate of bolts can reach 0.1mm. Solutions include a hot-dip galvanized layer thickness ≥85μm and a Dacromet coating salt spray test ≥1000h.
- Anchorage failure: Insufficient foundation concrete strength is the primary cause. It is necessary to ensure 28-day strength compliance and a drilling depth deviation ≤5mm.